Earlier I had shared two post important post on displaying Blogger Post on homepage - Show Blogger Posts in Gird Style and Adding Read More button to Blogger post. Now the question is why I am mentioning these posts. Actually the trick that I'm going to share in today's post very much goes with these two posts. If you are showing your Blog's posts in Gird Style or Automatic Summary then you will have to add a widget below first post to show any element like Adsense Ads. In this post I am gonna show how to add a widget below first blogger post.
Normally you can add gadgets in your blog from the layout option, but you only can add the gadgets in that place where the design section allows you. So, if you want to add any widgets below the first blogger post then you need to add a gadget section in your Blogger Layout. By the way you can apply this gadget in any design, the above mentioned two design is not a requirement. And you can add such widget by using a simple HTML code that I'm sharing.
Adding Widget Below First Blogger Post:
That's it, Now view your blog and you will see that the added widget is appearing below the first post of your blog.
Normally you can add gadgets in your blog from the layout option, but you only can add the gadgets in that place where the design section allows you. So, if you want to add any widgets below the first blogger post then you need to add a gadget section in your Blogger Layout. By the way you can apply this gadget in any design, the above mentioned two design is not a requirement. And you can add such widget by using a simple HTML code that I'm sharing.
When you will add a gadgets section and show any widget below your first post then it will be look like the above image. If you are blogging on blogger platform then you can easily add a widget in your blog as show in that image. OK let's see how to do the trick.
Warning: Before doing any kind of customization on your site's HTML page, I will recommend you to backup your site Template. To know more about Template backup Read This Post.
Adding Widget Below First Blogger Post:
- First Sign into your Blogger Account and go to Dashboard.
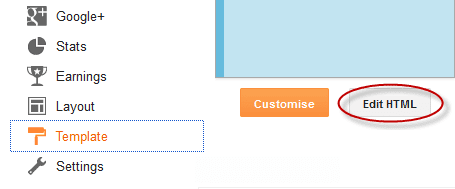
- Then click on Template and then click on Edit HTML button. You will land on the HTML page.
- Here in the HTML page find this line <b:include data='post' name='post'/> and Just below it Paste the Following code.
  <b:if cond='data:post.isFirstPost'>
 <div align="center" style="margin:10px auto;">
 Here goes the code of the element you want to show
 </div>
 </b:if>
- Note: The Bold text indicates that where you will have to paste the code of the element. (eg. Adsense Ad Code)
- Customization: The Red line in the above code is for Margin-Top and Margin-Bottom, this is in case if you want the element to move towards or away from the entire. You can also add any style like Background Color, Border etc.
- Finally click on Save Template Button to apply it. (Preview to make sure Everything is OK)
That's it, Now view your blog and you will see that the added widget is appearing below the first post of your blog.
Stay with www.iTTimesbd.com for more IT related post


No comments:
Post a Comment