Showing posts with label Blogger Image. Show all posts

Tuesday, February 3, 2015

How to Customize Blogger Image Lightbox!

If you are blogging on Blogger platform then you can show your blog's images in light-box. There is an option in Blogger settings to showcase it's images in light-box. As a result of the image light-box, when you click any image on your blog that images will open in an overlay on top of your blog. If your post has multiple images, they will appear as thumbnails along the bottom.But sometimes you may have wanted to change the default design of blogger image light-box. If so, then you are in the wright post. In this post I am gonna show how to customize blogger image light box.

Blogger Image

Above image is the example of the default Blogger Image Light-box. If you don't like this design then you can customize it on your own taste. The CSS code that I am sharing, by adding it to your blog you will be able to change the entire look of the modal window: Background Color, Border of the Image, The Bar showing the thumbnail, Text within it, Close button and the transparency. All you have to do is to overwrite the default design and change it with yours. Lets see how to do the trick.

Warning: Before doing any kind of customization on your site's HTML page, I will recommend you to backup your site Template. To know more about Template backup Read This Post.

Customizing  Blogger Image Lightbox:
  • First Sign into your Blogger Account and go to Dashboard.
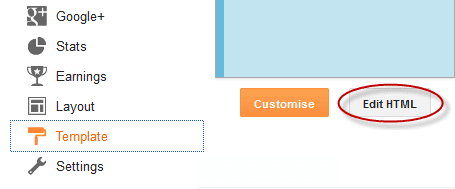
  • Then click on Template and then click on Edit HTML button. You will land on the HTML page.
  • Here in the HTML page find </head> tag and Paste the following code just Above it.
  <style>  
 /* Background Color */  
 .CSS_LIGHTBOX_BG_MASK {  
 background-color: #ffffff !important;  
 background-image: url(image-url-address) !important;  
 opacity: 0.8 !important;  
 filter: alpha(opacity=90) !important;  
 }  
 /* Images Border */  
 .CSS_LIGHTBOX_SCALED_IMAGE_IMG {  
 outline: 0px solid #fff !important;  
 -webkit-border-radius: 10px;  
 -moz-border-radius: 10px;  
 border-radius: 10px;  
 -webkit-box-shadow: 0px 0px 5px #000000;  
 -moz-box-shadow: 0px 0px 5px #000000;  
 box-shadow: 0px 0px 5px #000000;  
 }  
 /* Close Button */  
 .CSS_LIGHTBOX_BTN_CLOSE {  
 background: url(image-url-address) no-repeat !important;  
 width: 24px !important;  
 height: 24px !important;  
 }  
 /* Thumbnails Bar Color */  
 .CSS_LIGHTBOX_FILMSTRIP {  
 background-color: #eaeaea !important;  
 }  
 /* Text Color */  
 .CSS_LIGHTBOX_ATTRIBUTION_INFO, .CSS_LIGHTBOX_ATTRIBUTION_LINK {  
 color: #000 !important;  
 }  
 /* Index Info (number of images) */  
 .CSS_LIGHTBOX_INDEX_INFO {  
 color: #555555 !important;  
 }  
 </style>  

Customization: The blue Text explains to which Part the code belongs to. And you can modify the area of the lightbox from that part.
  • * Background Color * - You can change the Background color of the Lightbox and also can replace the background color with an image from here. To replace the background color with an image just Replace this line image-url-address with your Image URL. Below that if you decrease the opacity: 0.8 value the background will become more transparent.
  • * Close Button * - To change the icon for Close Button just Replace this line image-url-address with your icon Image URL.
  • * Index Info (number of images) * - To change the text color of image, just change the #555555 value.

  • Finally click on Save Template button to apply the design.

That's after customizing the image light-box, now view your blog and click on any image and see the result.


Stay with www.iTTimesbd.com for more IT related post

Thursday, January 16, 2014

How to Replace Blogger Navigation Links with Image!

Hello Blogger! Today I have come with an interesting and important trick for you all. If you are blogging on Blogger platform then I am sure you re very much familiar with the Blogger Navigation Link - Older Posts <--> Home <--> Newer Posts. These links located at the bottom of the blog page. This post is completely dedicated to them who are not satisfied with thins link and want to replace these navigation link with buttons or image. And by going through this post you will be able to replace these navigation links.

blogger tips and tricks

Have look at image above when you will replace Navigation links then Navigation buttons or images will be shown in place of them. All you need just to find the navigation link code inside the HTML page of your blog and replace them with the code that I'm sharing. You can also use the Navigation buttons or image of your own choice. Let's see how to do the trick...


Warning: Before doing any kind of customization on your site's HTML page, I will recommend you to backup your site Template. To know more about Template backup Read This Post.

Replacing Blogger Navigation Links with Image:
  • First Sign into your Blogger Account and go to Dashboard.
  • Then click on Template and then click on Edit HTML button. You will land on the HTML page.
edit blogger template


To Replace the Older Posts link:
  • Inside the HTML page find <data:olderPageTitle/> and replace it with the below code.
 <img src='https://blogger.googleusercontent.com/img/b/R29vZ2xl/AVvXsEgZuFnyz7cJ_tMksNNjw8ui_B0SNnSLHgdtn9hq7k9CeyteIewUemHfxqr-ENq7ikzLDePDIVQ99v_UHC8rg5qWGexJrG0XuPJo803rawyIGb_u-0DOffyGh2ZQ2EmmVdFZ_5A4lyuaGVAH/s1600/btsnts-Newer.png' style='border: 0 none;vertical-align: middle;'/>  

To Replace the Newer Posts link:
  • Then again find <data:newerPageTitle/> and replace it with the below code.
 <img src='https://blogger.googleusercontent.com/img/b/R29vZ2xl/AVvXsEgG1AAKv8P3gPOhdgJfTK1CIRY41qMTEzV9jq8AknEIULwlqsIdATjACjowCWizKOVZRp8rTSq6J1jRo4vtSN9XxZuxOVXL7I0z_o-BAmJSR4WO1zN73D4d0xGemP1RLQmeT6bCI-oWQ-wT/s1600/btsnts-older.png' style='border: 0 none;vertical-align: middle;'/>  

To Replace the Home link:
  • Now find <data:homeMsg/> and replace it with the below code.
 <img src='https://blogger.googleusercontent.com/img/b/R29vZ2xl/AVvXsEh6PGAT96JhKR_gyDy85u_mjVNqiNawa5Goe3er_4Dy6HQL5Jw8CyHMGTpj4noOZgytKgkVksWcduPp_6zcVzUrT3kwZNYJ0gOKahTBpS_kmO2a2IFZXHje9JueveSs6rF2qS0F79u-16la/s1600/btsnts-Home.png' style='border: 0 none;vertical-align: middle;'/>  

Finally after completing all the above steps correctly, click on Save Template button..


Customization
  • As I said above you can use buttons of your own choice. To do so just Replace the image URL in the above codes with your image URL. In the above three codes the image URL is colored with Red.

That's it, Now view your blog and check the navigation buttons at the buttons of your blog. If everything is OK then the Navigation links will be replaced with Navigation button or images.


Stay with www.iTTimesbd.com for more IT related post
Monday, December 16, 2013

How to Add Link to Image in Blogger Post (Exclusive!)

How to Add Link to Image
If you are blogging on blogger platform then you may need to insert image to your blog to use them on your post. Actually the images used on post played very important role. Because these images make you post more understandable to the visitors. But not only that, if your want then these images can create more value for you. Because if the images of your blog's posts are well optimized and properly managed then these can be good source of traffic. And adding link to image is one of the effective trick. In this post I'm gonna show how you can add link to your post image in Blogger.


The image optimization trick that I'm gonna show in this post, is applied to Blogger post. And as you know in Blogger there is an option to add link at post editor. Using this link option you can add link not only in the post text but also in the post images. Normally when you insert any image in your post that automatically get an URL, but this is online image URL. But if you place the link of that post to its images in place of the image URL then it will help you to increase the traffics. Because when a visitor click on a image the same post will open again. As result you will get one more pageview from the same visitor. Let's see the procedure.

Also Read: How to Optimize Blogger Images for Better SEO!

 Adding Link to Image in Blogger:
  • First Sign into your Blogger Account and go to Dashboard.
  • Then insert image in your new post or edit any old post.
  • Now click on the image to select it.
  • Then click on the Link button to remove the URL/link that the image already had.
remove image link
  • Then again select the image and click on Link button. As a result the Edit Link windows will be prompted.
  • Here in this windows Paste the link at Web address box that you want to add.
  • Finally click on OK button to complete the addition.
add link to image

That's it, the link has added to your image. Now view that post a click the image on which you have added link to see the result.


Stay with www.iTTimesbd.com for more IT related post