Showing posts with label Search Engine Optimization Tutorial. Show all posts

Sunday, May 10, 2015

How to Create BackLinks by Commenting [->SEO<-]

create backlinks
If you're a regular Blogger, Webmaster or working on Search Engine Optimization then I am very sure that you're familiar with the name BackLink. But there are many beginners, who don't know much about BackLink and its Importance. My today's post is dedicated to them. In in this post I am gonna discuss about the importance of BackLinks and show you how to create BackLinks for Website and Blog is very simple and easy way.


BackLinks of a sites is one of the most essential part of Search Engine optimization, and it is one of the most important component considered by the Search Engines. The site having the higher BackLinks get the priority from the Search Engines in the search result. On the other hand BackLink is also help a site to get higher Alexa link. So, you can easily imagine that how important BackLinks for a site. By the way BackLinks is also effective trick to drive traffics to a site.


Backlinks, also known as incoming links, inbound links, in-links, and inward links, are incoming links to a website or web page. To define BackLink - The link of your site which is linked with another site is called BackKink. And creating BackLink is placing your site links on other site's - Comments, Guest Posting or Link Submit. There are several way you can create BackLinks. I have discussed 4 easy way below...

  • Commenting: This is the most common way to create BackLinks. Just comment on other website, blog, forum etc with your site's link. Make sure your comment is relevant, useful and attractive. Use anchor text HTML code to add your links to your comments.
  • Guest Posting: There are many website. blog and forum throughout the web where you can publish your post as Guest Author. And in your post you can place your site's related link. Which works as your site BackLinks.
  • Creating Accounts: There are many websites, blogs and forums let their users create an account with their own URL. So, create accounts on those sites using with your site URL to create BackLinks.
  • Like Submission: There are many free link submission sites available throughout the web. Submit your site link there. These submitted links will also be considered as BackLinks.


Commenting is the Easiest: Beside the above mentioned way there are many other way to create BackLinks. But my personal recommendation is Commenting. Because this is the easiest and successful way. All you need to write a relevant comment with anchor text.

If you want to create anchor text you will have to use specific code. There are two types of codes to create anchor text - HTML anchor text and BB code anchor text. HTML anchor text code used in HTML sites/blog and BB code anchor text is used in Forum comment.


Creating HTML Anchor Text:

  • Your Text: www.iTTimesbd.com - Your Ulrimate IT Partner
  • Your Link: http://www.ittimesbd.com
  • Anchor Text Code: <a rel="nofollow" href="http://www.ittimesbd.com"><b>www.iTTimesbd.com - Your Ultimate IT Partner</b></a>

Creating BB Code Anchor Text:

  • Your Text: www.iTTimesbd.com - Your Ulrimate IT Partner
  • Your Link: http://www.ittimesbd.com
  • BB Code Anchor Text: [url=http://www.ittimesbd.com]www.iTTimesbd.com - Your Ulrimate IT Partner[/url]

The result of these two code will be www.iTTimesbd.com - Your Ultimate IT Partner , and when someone will click on the link it will directed the visitors to your site. Before making commenting on any site include this code by changing text and link with yours.


Please Share This Post or At Least press g+1 on Every Post
Stay with www.iTTimesbd.com for more IT related post

Tuesday, May 5, 2015

Make Your Site Mobile-Friendly to Get Higher Rank!

Making Website Mobile Friendly
Very Recently Google has applied a new rules for website in their ranking system. From April 21, 2015 Google Search had started to consider mobile-friendliness of a site as a ranking signal. That means now the sites which is mobile friendly will get higher rank. As result of this new rule the following important changes is brought in the Google Search Result...

  • This change will affect mobile searches in all languages worldwide and will have a significant impact in Google Search results.
  • Users will find it easier to get relevant, high quality search results optimized for their devices.

I a have got to know about this new rule of Google Search Result a few days ago when I was signed in to my AdSense Account. I have got  a notification there saying - Your site's mobile-friendliness is now considered as a Google Search ranking signal. I have tested my site already and www.iTTimesbd.com have passed the Mobile-Friendliness test successfully - Result is below:

Testing Website Mobile Friendliness


Is your site Mobile-Friendly ? If you don't know then check it quickly. Google has an excellent Mobile-Friendly Test tool to check a site's mobile friendliness. This tool shows how Google Search sees your pages. Follow the steps below to check your site's Mobile-Friendliness...

  • Then Enter your site's URL in the box and click Analyze button

That's it within a few seconds you will get your site's Mobile-Friendliness test result. If the result is positive then nothing to worry about. But if the result is negative, then take sufficient steps as quick as possible to make your site Mobile Friendly.


Making a Site Mobile Friendly:

There is nothing that can be said to make a site mobile friendly. It is basically depends on the content management systems (CMS) that you are used to manage your websites or blogs. Webmasters use different website software packages like WordPress, Blogger, Joomla!, Drupal, Tumblr, Google Sites etc. to manage their sites.


As I'm not expert of these website software packages (CMS), that is why I can't suggest you any solution regarding these. And as a Blogger blogging on Blogger.com platform I can only provide solution for Blogger.com platform. But don't worry Google Developer guides on making sites mobile friendly will provide you complete solution. All you need just to select your website software package.


Useful Link to Make Mobile-Friendly Site:


Guide for Blogger.com Platform:

Sites/Blogs created on Blogger.com Platform, making them Mobile-Friendly is much easier. Because here Mobile Templates are privileged with Mobile-Friendliness by default. And there are some Mobile-Friendly templates available here. All you need just to Enable and choose your Mobile Template...

  • Sign Into your Blogger Account and go to Dashboard.
  • Then click on Template option.
  • Then click the Gear icon under Mobile.
  • Now select Yes. Show mobile template on mobile devices.

Mobile Friendly Templates of Blogger 

Choose Mobile Template: Here you can choose templates of you own choice from the different types of templates available here. All of them are Mobile-Friendly. You can also choose Custom, then your desktop template will be adapted for mobile devices. But I will recommend you to avoid the Custom option, because it may not work fine of mobile device.

  • Finally click on Save button to apply the template.

That's it, your site/blog is Mobile-Friendly now. But before come to any conclusion you must take a test of your site's / blog's Mobile-Friendliness Test.


Please Share This Post or At Least press g+1 on Every Post
Stay with www.iTTimesbd.com for more IT related post

Sunday, October 5, 2014

How to Disable Blogger Threaded Comments!

Before I discuss about Blogger Threaded Comments I will recommend you to read one of my earlier post on blogger comment. In that post I had shown the Best Way to Optimize Blogger Comments Option. I have tried to discuss about how you can make your can make your blog's comment option more visitors friendly. Now come to the today's post's topic. Today I am gonna show how to disable blogger threaded comments.

You may wanted to know what is Blogger threaded comment? Blogger Threaded Comment is the commenting system that allows a reader to replay on another reader comment on blogger posts. By default Blogger supports two level commenting, the original comment and the replay of that original comment. If you don't like the threaded comment option then you can disable it. And you can do it by editing your site HTML page. Let's see how to do it...


Demo->
threaded comments


Note: Before doing any kind of customization on your site's HTML page, I will recommend you to backup your site Template. To know more about Template backup Read This Post.


Disabling Blogger Threaded Comments:
  • First Sign into your Blogger account and go to Dashboard.
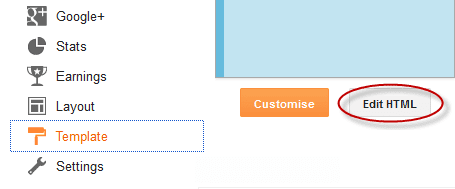
  • Then click on Template and then click on Edit HTML button. You will land on the HTML page.
    edit blogger template
  • Here in the HTML page find the following code. Search by first line of the below code to find it easily.

  • <b:if cond='data:post.showThreadedComments'>
                <b:include data='post' name='threaded_comments'/>
              <b:else/>
                <b:include data='post' name='comments'/>
              </b:if>
            </b:if>
            <b:if cond='data:blog.pageType == &quot;item&quot;'>
              <b:if cond='data:post.showThreadedComments'>
                <b:include data='post' name='threaded_comments'/>
              <b:else/>
                <b:include data='post' name='comments'/>
              </b:if>
            </b:if>

  • Then Replace the above code by following code.

  • <b:include data='post' name='comments'/>
              </b:if>
                   <b:if cond='data:blog.pageType == &quot;item&quot;'>
                         <b:include data='post' name='comments'/>
            </b:if>

  • Now click on Save Template button to apply the change.

That's it. Now view your blog and you will find that your blog's Threaded comments option is disabled.


Stay with www.iTTimesbd.com fore more IT related Post

Thursday, September 25, 2014

Best Way to Optimize Blogger Comments Option !!!

Blogger comments is a wonderful option to increase the engagement of visitors with your blog. But spam and irrelevant comments can make your blog polluted. That is why you need optimize your blog's comments option. So, that you can protect your blog from spammer. Earlier I had published a post about Captcha Code Verification in Blogger Comments. And today I am presenting some tips by which you can optimize your Blogger blog comment option.


If you are blogging on Blogger platform then this post dedicated to you. By making some adjustment in the Blogger Settings you can make your Blogger Comments option more optimized.


Objectives Of This Post...
  • Making Blogger Commenting Process More Easier.
  • Protection Blogger From Spammers.
  • Increasing Blog's Visitors Engagement.

First you need to Sign Into your Blogger Account and go to Dashboard. Then click on Setting and choose Post and Comments. And you will land on the following interface. Then do the following customization.

Blogger Comments Optimization

  • Comment Location: By this option you can customization the location of your blogger comments box. By default the comments box location is Embedded. That means the comments box location is fixed at the below of the posts. There are another three options available named Full page, Pop up or Hide. But you should use Embedded option, because visitors like embedded comment box.
  • Who Can Comment?: There are four options are available here, Anyone, Registered User, User with Google Accounts and Only members of this blog. The default option is Anyone. Choose the Registered User option. Because Anyone option allows anonymous users to comment on your site. And anonymous comment has no value. So, you should use Registered User option.
  • Comment Moderation: Here you will get three options: Always, Sometimes and Never. You should choose Sometimes or Never. In suggest you not to choose Always. Because when a visitor make any comment on your blog, He/She wants to see his/her comment appearing immediately. And in that case Never option inspire the visitors to make comment most, which increase the visitors engagement.
  • Show Word Verification: By default Word Verification is on for Blogger Comments. But I will suggest you to use NO. If you are interested to know more about this option then read this full post about Word Verification on Blogger Comments.
  • Show Backlinks: Here you will get two options, You can choose either Hide or Show. If you choose Show then a link saying Create a Link to this Post will be shown under the comment box. If any visitor click on this link then he/she will get a link of this current post. Basically this option is less important.
  • Comment Form Message: This option also less important. If you want to give any message or direction to the comments makers then you can write is here. The message and direction will be shown just below the comment box. You can write any advice or rules about comment making regarding your site policy, which will help the visitors to make relevant comment.

Tips for Blogger Comment Management:
  • Most of the comments are made by the site or blog owners. They make comment to create backlink. I suggest you to allow them. Because crating backlinks is healthy for any site.
  • When any visitor create backlink by his/her with irrelevant comment then don't remove the comment immediately. First you should request the comment maker to make the comment relevant with the post, otherwise you should delete/remove the comment.
  • You should check Comment Spam box regularly. To check comment spam first click on Comment then click Spam. If any normal comment is detected as spam than you should choose not spam for this comment. If any suspicious comment is not marked as spam then you can mark these comments as spam.

Extra Tips:
  • Never misbehave with your blog/site visitors. Always try to behave with them with service mentality. Because they are the most valuable wealth of your site. Some visitors may come to your site only for creating backlinks purpose, whatever their objectives are, don't show hostile behavior with him. Inspite of having a lot of site to create backlinks, they pick your site. It shows your credit. Always try to manage and respond your blog's comments in a better way to increase the visitors engagement.


Stay with www.iTTimesbd.com for more IT related Post

Tuesday, September 16, 2014

Add and Verify Site in Yandex Webmaster Tools !!!

Verify Site in Yandex Webmaster Tools
Yandex Search is the largest search engine in Russia. It has more than 60% share in Russian internet traffics. Yandex ranked as the 4th largest search engine worldwide. That means it serves a good numbers of traffic. So, like Google and Bing webmaster Tools it is very necessary to add and submit your site to Yandex Webmaster Tools. In this Post I am gonna show how to add and verify a site in Yandex Tools.

  • Related Posts:
  1. How to Submit Sitemap to Google Webmaster Tools!
  2. Add and Verify Site in Bing Webmaster Tools !!!

Primarily Yandex offers searches in Russian, but it also offers Yandex Webmaster Tools account in English to help the site owner submitting their site sites to Yandex Search Engine. But the English version has some limited features. Basically there are two way you can submit your site to Yandex, one is With Registered Account and the other one is Without Registration. But I highly recommend you to have a Registered Yandex Webmaster Tools account to have all the available utilities. Let's see how to add and verify a site in Yandex Webmaster Tools...


Adding Site To Yandex Webmaster Tools:
  • First you have to register from here Yandex Webmaster Tools account. Fill the registration form with required information. You will get an activation code to your given mobile number. Activate your account using this activation code.
  • Then Log in from here Yandex Webmaster Account. (You can Log in to Yandex account using Facebook, Twitter or Google account).
  • After loging to the Yandex account click on Add Site link.
  • Then enter your site homepage URL (i.e http://www.ittimesbd.com) in the URL box and click on Add Site button.
    Adding a Site to Yandex

Verifying Site In Yandex Webmaster Tools:

After adding your site to Yandex Webmaster Tools, the next step is about site verification. Here in this step you will have to verify the ownership of your site to complete the addition. There are four methods available for the verification. But personally I will suggest you to use the Meta Tag method.
  • Now click on Meta Tag option.
  • Then Copy the Meta Tag Code and Paste it in the <head> section of your default web page.

    • For Blogger:
    1. Now open another window and Sign Into your Blogger Account and then go to Dashboard.
    2. Then click on Template option and click Edit HTML button. You will land on the HTML page.
    3. Here in HTML page find <head> tag and Paste the Meta Tag Code just below of it.
    4. Then click on Save Template button to apply it.

  • Then click on Check button to complete the verification process.
    Site Verification in Yandex

Add Sitemap To Yandex Webmaster Tools:

After adding and verifying your site, you will have to add your sitemap to Yandex Webmaster Tools. As a result Yandex Search Engine can crawl your site more efficiently, and you will get better Yandex search rank. If you don't have any any idea about sitemap then read these two post about Importance of Sitemap and Creating Sitemap. Let's see how add sitemap to Yandex Webmaster Tools...
  • First click on Indexing option and then click Sitemap Files.
  • Then enter the Sitemap URL in the sitemap box.
  • Now click on Add button to complete the addition. You can also click Check button to check that the Sitemap is working properly or not.
Submitting Sitemap to Yandex

Then you will see the Processing status for the added Sitemap. It will take maximum two days to complete the successful processing.

That's it. After completing the successful addition of your site to Yandex Webmaster Tools, now you can monitor the performance of your site on Yandex Search and also can improve you site for better Yandex Search Rank.


Stay with www.iTTimebd.com for more IT related Post

Monday, September 15, 2014

Add and Verify Site in Bing Webmaster Tools !!!

Verify a Site to Bing Webmaster
Bing search was previously known as Live Search, Windows Live Search, and MSN Search. It is one of the popular search engine from Microsoft. Yahoo search is another search engine from Microsoft. But among these search engine Bing is free and Yahoo is premium service. So, you can only submit your site/ blog to bing webmaster for free. Earlier I have shown how to Add and Submit a site to Google Webmaster Tools. And today I am gonna show How to Add and Verify a SITE to Bing Webmaster Tools.

  • Related Posts:
  1. How to Add Site to Google Webmaster Tools!!!
  2. How to Submit Sitemap to Google Webmaster Tools!

Though Google is the world's largest search engine, but Bing also produce a good numbers of online traffic. Who don't want to get maximum? So, it is very important to submit your site to Bing Webmaster Tools. As Bing is a search engine from Microsoft, So, you need to have a Microsoft Account to Submit your site to Bing Webmaster tools. You can use your Yahoo, Hotmail and Outlook id to Sign Up for Microsoft Account.


Submitting A Site To Bing:

There are two way by which can submit your site to Bing search engine. One is only submitting the Homepage URL and other one is submitting the whole site with sitemap. Let's complete the whole process step by step...

  • Submitting Only Site URL:
  1. First you have to go here Bing Submit URL
  2. Then Enter your Site homepage URL (i.e http://www.ittimesbd.com) and also enter the Captcha code.
  3. Now click on Submit button.

That's it, Now you will see a message saying "Your request was successfully submitted". Here you will get three buttons. 1st one is Signup button, 2nd one is to know more about Bing Webmaster Tools and the 3rd one is to exit the process. Among these three buttons Signup button is important.


Open A Bing Webmaster Tools Account:

You can Sign up for free Bing Webmaster Tools Account. You just need to have a Microsoft Account. If you have a Outlook or Hotmail account then you likely have a Microsoft account already. Alternatively, just click sign-up and create a Microsoft account as part of the Webmaster Tools sign-up process.
  • Add and Varify a Site to Bing Webmaster:
Once you have a Bing Webmaster Tools account, you can add and submit your site's sitemap. Let's see how to add and submit sitemap to Bing Webmaster Tools...
  1. First Sign In to your Bing Webmaster Tools account.
  2. Then from the Left panel click on Add a Site link.
  3. Now enter your site homepage URL (i.e http://www.ittimesbd.com) in the URL box and enter the Sitemap URL in the Add a Sitemap box. (If you don't have any idea about sitemap then Read this Post About Creating Sitemap).
  4. Then click on ADD button.

    • Now you will have to verify the ownership of your site to complete the addition. For this you will get three option. But personally I will suggest you to choose Option 2:. In the Option 2: you will get a Meta Tag Code.

  5. Now Copy the Meta Tag Code from the Option 2.
    Bing Site Verification Button
  6. Then Paste this Meta Tag Code in the <head> section of your default web page.

    • For Blogger:
    1. Now open another window and Sign Into your Blogger Account and then go to Dashboard.
    2. Then click on Template option and click Edit HTML button. You will land on the HTML page.
    3. Here in HTML page find <head> tag and Paste the Meta Tag Code just below of it.
    4. Then click on Save Template button to apply it.

  7. Now back to Bing Webmaster Tools page and click on VERIFY button.

That's it. If you have completed the entire process properly then the verification of your ownership will be successful. And you will see Verified logo beside you site domain address like the above image.


Stay with www.iTTimebd.com for more IT related Post

Saturday, September 13, 2014

How to Submit Sitemap to Google Webmaster Tools!

Submit Sitemap to Google Webmaster Tools
If your regular blogger and SEO specialist then I am very much sure that your families with Google Webmaster Tools. I don't want to discuss about Google Webmaster Tools in this post. Because I have already published a post discussing details about Google Webmaster Tools. Today I will only show how to submit your site's sitemap to Google Webmaster Tools.


As I said creating sitemap for your site is not important, submitting the sitemap to webmaster tools is more important. If you submit your site's sitemap to webmaster then search engine can crawl your site more efficiently. But before submit your sitemap you need to create sitemap for your site and before that you need to add your site to Google Webmaster Tools. In that case read these below two posts...

After completing above two task, now it is time to submit your site's sitemap to Google Webmaster Tools. If you have read the second post of the above two posts then you have got know that the URL of a sitemap will like below...


http://www.ittimesbd.com/atom.xml?redirect=false&start-index=1&max-results=500


You need to make a little change in this sitemap URL. Replace http://www.ittimesbd.com with you site's homepage URL. But you don't need to use the full URL. Let's see how to submit sitemap to webmaster tools...

  • First you have Sign In from here  Google Webmaster Account
  • Then go to Webmaster Dashboard.
  • Then click on the Site Address on which you want to add sitemap.
  • Then on the left panel choose Crawl and click on Sitemaps.
  • Now click on  ADD/TEST SITEMAP  button located at the right top corner.
  • Then a small box will appear. Here in this box Enter the following line and click on Submit Sitemap button.

atom.xml?redirect=false&start-index=1&max-results=500


Extra Tips: If your site has more than pages then use the following line.

atom.xml?redirect=false&start-index=501&max-results=500


That's it. After submitting the sitemap successfully. Now Google search engine boot will shart to crawl and monitor your site more efficiently.


Stay with www.iTTimebd.com for more IT related Post

Friday, September 12, 2014

How to Create XML Sitemap for Blogger/Website!!!

How to Create Sitemap
In the previous post I discussed about the importance of sitemap for website/blog to get better search ranking. That was published as the preparation of this post. And today I will show how to create a sitemap for website and blog. Creating sitemap for blogger and website is same. To know more about sitemap read the below post.


There are several way you can create sitemap for your site. As I said in the previous post that among two types of sitemap format XML and HTML, expert prefer XML sitemap. So, I will show how to create XML sitemap. Basically creating sitemap for a site is not important, The important thing is to submit it to webmaster tools. Lets see how to create sitemap.


Now have a Look at the Below Code...

# Blogger Sitemap generated on 2013.11.04
User-agent: *
Disallow: /search
Allow: /
Sitemap: http://www.ittimesbd.com/atom.xml?redirect=false&start-index=1&max-results=500


The code is the XML sitemap of www.iTTimesbd.com. Actually in this code this blue line is the sitemap link. Using this same link you can create site sitemap for your site. You just need to replace this http://www.ittimesbd.com URL with your site/blog homepage URL. Then paste full URL in your browser address bar and hit Enter. You will get the sitemap for your blog/website.

When you will submit your site/blog to search engine webmaster you just have to use the URL sitemap link only. Basically sitemap contains all URL of your site's pages. Which helps the search engine robot to crawl your site very easily. The above whole code is commonly called Custom robot.txt. I have created this code using the following method.

  • First click on the link Sitemap Generator
  • Then Paste the homepage URL of your site in the blank box. (example: http://www.ittimesbd.com)
  • Then click on Generate Sitemap button.
  • Now you will the sitemap as shown in the below image.
sitemap for www.ittimesbd.com

Now you can save this code. This code will need to setup custom robot.txt and the Sitemap URL will need to submit sitemap to webmaster tools. Next I will publish post on both of these topics.


Stay with www.iTTimebd.com for more IT related Post

Thursday, September 11, 2014

How to Add Site to Google Webmaster Tools!!!

Add Site to Webmaster Tools
As we all know Search Engine Optimization is very important for a site to get better Search Engine ranking. To optimize your site you need to add your site to webmaster tools. And in this case Google Webmaster Tools is the best webmaster tools for website/blog. In the previous post I had discussed about the importance of adding website/blog to Google Webmaster Tools. Today I am gonna show you how to add your site to Google Webmaster Tools.


To add your site to google webmaster tools you need to have a Gmail account. If you don't have Gmail account then create it now. Or you if you are blogging on blogger platform then you can add your blog to google webmaster tools using the Gmail address that you are using with your blog. Lets see how to add a site to Google Webmaster Tools.


Adding Site to Google Webmaster Tools:
  • First Sign Into your Google Webmaster Account.
  • Then click on  ADD A SITE  button located at the top of the screen.
  • Then enter the URL address of your website/blog (Example: http://www.ittimesbd.com/) and click Continue button.
  • Then in the next page you will have to select the method to Verify Ownership. I will suggest you to use Alternative Methods. Now click on Alternative Methods tab.
  • Now here in the Alternative Methods click on Add a meta tag to your site's home page.
  • Then Copy the generated Meta Tag Code.

    google webmaster verify ownership

  • Now open another window and Sign Into your Blogger Account and then go to Dashboard.
  • Then click on Template option and click Edit HTML button. You will land on the HTML page.

    edit blogger template

  • Here in HTML page find <head> tag and Paste the Meta Tag Code just below of it.
  • Then click on Save Template button to apply it.
  • Now back to Google Webmaster Tools page and click on  Verify  button in the Alternative Methods section.

That's it. If you have completed the entire process properly then the verification of your ownership will be successful. And also you site will be added to Google Webmaster Tools successfully.


Stay with www.iTTimebd.com for more IT related Post

Wednesday, September 10, 2014

Importance of Sitemap for Website/Blog!!!

Sitemap for website
I am very much sure that you are familiar with maps, I meant world map. Basically a map shows us area and the location of country, city, university and many important places. But the question is how many of us know about sitemap. It is very important term to the web developer and webmaster. But the general people hardly know about this. Though it is a very important part of SEO, but new blogger are not conscious about this. That is why I am sharing this post. Lest know details about website/blog sitemap...

Sitemap is a file by which you can list the pages of your site. A sitemap is used to tell Google and other search engines about the organization of your site content. Basically search engine crawlers like Googlebot read the sitemap file to crawl your site more intelligently. Ideally, if a site pages are linked properly, then search engine crawlers can usually discover most of your site.


There are two types of Sitemap. One is XML sitemap and other one is HTM sitemap. An XML sitemap is the structured that tells the search engine about the pages of a site, their relative importance to each other, and how often they are updated. On the other hand HTML sitemap is designed to help the users to find content on the page and also helps visitors and search engine bots find pages on the site. Experts opinion, XML sitemap is more effective.


Now Look at the Following URL...


If you click on the above URL then you will get the sitemap of this site www.iTTimesbd.com. A few lines of the site is presented below. Now take a look at the sitemap carefully, you can find page list of this site.


<?xml version='1.0' encoding='UTF-8'?><?xml-stylesheet href="http://www.blogger.com/styles/atom.css" type="text/css"?><feed xmlns='http://www.w3.org/2005/Atom' xmlns:openSearch='http://a9.com/-/spec/opensearchrss/1.0/' xmlns:blogger='http://schemas.google.com/blogger/2008' xmlns:georss='http://www.georss.org/georss' xmlns:gd="http://schemas.google.com/g/2005" xmlns:thr='http://purl.org/syndication/thread/1.0'><id>tag:blogger.com,1999:blog-5800044289708720615</id><updated>2014-09-03T22:22:08.692+06:00</updated><category term="Tips and Tricks"/><category term="How To"/><category term="Pc-Solution"/><category term="Internet"/><category term="Information"/><category term="Computer"/><category term="Blogger"/><category term="Windows"/><category term="Windows 8"/><category term="Windows 7"/><category term="Software"/><category term="Windows XP"/><category term="Blogging"/><category term="Android"/><category term="Mobile Phone Tricks"/><category term="blog"/><category term="Facebook"/><category term="Browser"/><category term="Download"/><category term="Search Engine Optimization"/><category term="Microsoft"/><category term="Facebook Tricks"/><category term="Notepad Trick"/><category term="SmartPhone"/><category term="Google"/><category term="Graphics Designing"/><category term="Photoshop Tutorials"/><category term="Windows 8.1"/><category term="Portable Software"/><category term="Online Earning"/><category term="Add Gadgets/ JavaScripts"/><category term="Flash Games"/><category term="Microsoft Office"/><category term="Security"/><category term="Small Flash Games"/><category term="Free Games"/><category term="Gaming"/><category term="Google Chrome"/><category term="Internet Download Manager"/><category term="Mobile Phone Specification"/><category term="Pen Drive"/><category term="Reviews and Specification"/><category term="firefox"/><category term="Widgets For Blogger"/><category term="Youtube"/><category term="increase alexa rank"/><category term="Cool Android Apps"/><category term="Custom Domain For Blogger"/><category term="Download Youtube Videos"/><category term="Format Hard Drive Of Computer"/><category term="PDF tricks"/><category term="Photoshop Marquee Tool"/><category term="Photoshop Tools"/><category term="Popular Posts Widget For Blogger"/><category term="Virus"/><category term="Windows 7 Activator"/>


Now I think you have a idea about the sitemap. The most important this is that the Search Engine can't index the pages of your site, if you don't add your site's sitemap to webmaster. Basically I have shared this post as the preparation post about creating and adding Sitemap to Google Webmaster Tools. Because it is very necessary to know about sitemap and its importance before creating and adding sitemap to webmaster tools.


Stay with www.iTTimebd.com for more IT related Post

Tuesday, September 9, 2014

What is Google Webmaster Tools? [Details Info]

Webmaster Tools
If you are regular blogger or a website owner then I am very much sure that you know the importance of search engine optimization for website and blog. Normally from the increase of your site's page views you can get an idea how optimize your site is. But you can not get any specific idea.

To get details information about your site you can use website monitoring tools for your site. There are many webmaster tools available, but who can be better than google. Google has a Webmaster Tools for website and blogger. Today I will discuss about this Webmaster Tools in details. Letter on I will publish series post about the various uses of this tools. Lets get answers of some question about this Webmaster Tools.

About Google Webmaster Tools:

Google Webmaster Tools is a free website monitoring service offered by the search engine giant Google. That helps you to monitor and maintain your site's presence in Google Search Result. Basically to include your site in Google's search result, you don't have to sign up for Webmaster Tools. But if you sign up for Webmaster Tools for your site then it can help you to understand how Google view your site and you can optimize your site's performance in search results.

Why Use Google Webmaster Tools:

The most important use of the Google Webmaster Tools is to monitor site's performance. Beside that these are some specific point for which a blog/website owner should use Google Webmaster Tools for his site. These are...
  • To make sure that Google can easily access your site's content.
  • You can submit new content for crawling and can remove the content that you don't want to show in search result.
  • To create and monitor the types of content that delivers visually engaging search results.
  • To maintain your site with minimal disruption to search performance.
  • To monitor and remove malware or spam issues so that your site stays clean.

These above information provided by the Webmaster Tools helps you to monitor and maintain your site. Beside that Webmaster Tools helps you to understand how the Google Search and the whole world sees your site. For this it provide the answer of the following questions...
  • Which sites are linking to your website?
  • Did some queries result in more traffic to your site than others?
  • Which queries caused your site to appear in search results?
  • Which sites are linking to your website?
  • Are your product prices, company contact info, or events highlighted in rich search results?
  • Is your mobile site performing well for visitors searching on mobile?

Who Should Use Google Webmaster Tools:

Everyone with a website/blog! From generalist to specialist, from newbie to advanced should use the Google Webmaster Tools. To have a better idea here I am presenting some names, who should use Google Webmaster Tools...
  • Business owner who delegates: If you think that you don't need to know the use of the Webmaster Tools, then its ok. But you should be aware of this Tools. Because when you hire a webmaster specialist for your site then can tell him to set up your website with Webmaster Tools. As a result you can monitor your site performance which will help you to make important business decisions about your site.
  • Site Administrator: A site administrator always care about the healthy operation of his site. This webmaster tools helps the administrator to monitor and in some cases resolve server errors, site load issues, and security issues like hacking and malware etc.
  • SEO Specialist: Search Engine Optimization is the most essential thing of a site for getting better Search Ranking. So, the Google Webmaster Tools helps the SEO specialist to monitor website traffic, optimize ranking, and make important decisions about the appearance of site's search results. 
  • Web Developer: Google Webmaster Tools helps the Web Developer to monitor and resolve common issues with markup, such as errors in structured data.


Stay with www.iTTimebd.com for more IT related Post

Sunday, August 24, 2014

How to Optimize Blogger Images for Better SEO!!!

Optimize Blogger Images
We blogger use many relevant images on our blog post. These images plays very important role for getting better search engine rank. Because while indexing your site's pages search engine don't just focus on your writing. Google and Bing search engine crawlers crawl your site for relevant information like backlinks, tags and even images that they might offer to their customers.

As I said images of a site plays very important role by creating visual sense to your site's readers. In short images make your site more understandable. But what most blogger and site owner does not know that the photos they uploads are not confined to their site only. Crawlers shows these images within their respectives search engine.

Almost every search engine has image search option. And image search option is a good source of website and blog traffic. Before uploading images on your site if you optimize it properly then you can good traffic from images search. In this post I am gonna share some important tips by which you can optimize the Blogger Images for better SEO.

Tip-1: Image Properties

Basically the search engine crawler only understand the codes and writing of your site. But when search engine crawls images of your site it don't even understands what to do with it because they are made to collect information not to interpret. So, to optimize your site's images properly you should label all the images tags.

As an example, suppose you have uploaded a dog image on your blog like below. Then click on the image and click on the Properties link of the image located at the below of the image. Now you will get two blank box for Title Text and ALT text. Now enter Cute Dog in the Title Text box and enter Sweet Dog in the ALT text box.

add ALT text to blogger image

Now when search engine crawl  this image it will imdisk this image in the name of Cute Dog and Sweet Dog. So, when someone search for dog's images in the name of Cute Dog and Sweet Dog then the search engines will show your uploaded image in the search result.

You can get good numbers of traffic if your images get top rank in the search result. And about getting top rank in the search result Title Text and ALT Text plays very important role. The more popular Title Text and ALT text you will use on your site's image the better search rank you will get and more traffic will be forwarded to your site. So, Title Text and ALT Text of the images is very important.

Tip-2: Add a Caption

After Title text and ALT text caption is another very important things of your site's images. For better image optimization you should always Add Caption to the images so, that the average visitor can understands what they are looking for. Not only that adding caption will make your site more professional and also engage the visitors with your site.

Everyone may not come across from Google Image search to your page only for viewing the dog's image. Mostly visitors want to download the image. The most important thing is that visitors found your images relevant to their search and as a result they will navigate to your site to save the image.

add caption to blogger image
Optimize Images For SEO

A better caption of your site's images will play an important in the Bounce Rate. When someone comes to your site from image search and realize that it is not what he looking for then he goes back to search engine immediately is called Bounce Rate. So, if you use caption images on your images it will reduce bounce rate also increase search engine rank.

Tip-3: Image Size

As reduction of bounce rate help better search rank, on the contrary increment of  bounce back rate help you to improve your site ranking. But basically bounce back rate depends on your site loading speed. Because no one want to visit a site having very slow loading speed. So, site speed is also very concerning matter of a site which mostly depends on the image size. You can read this post about Analyzing Your Site's Speed.

Optimize your site's images before uploading them to your site and try to keep them as small as possible while retaining the quality. So, that you can reduce the site's loading time. There may software available for image optimization. Among them my personal choice is Photoshop. While saving images from Photoshop use Save for Web option to reduce the size of it.


Stay with www.iTTimesbd.com for more IT related post

Thursday, July 17, 2014

How to Disable Blogger Local Domain Redirection

Almost every country of the world have their own local domain name extension on Internet. Such as .bd for Bangladesh, .in for India, and .us for United States of America. Currently 15-20 countries have their own Blogger domain. You may have noticed that sometimes your site is redirected to different countries local domain.

Disable Blogger Local Domain Redirection


Example: Lets consider my own domain, Though now I am using custom domain. My blogger blog address is http://livetechnologybd.blogspot.com

But when you will visit my site from...
  • Italy then the URL will redirect to http://livetechnologybd.blogspot.it
  • Canada  then the URL will redirect to http://livetechnologybd.blogspot.ca
  • India  then the URL will redirect to http://livetechnologybd.blogspot.in
blogger worldwide local url

Disadvantages: Now the question is, Is there any disadvantage of this Blogger local domain redirection. The answer is Yes. There are many disadvantages. Such as...
  • If your site redirect to local domain continuously then the social stats of your site may fall dramatically.
  • Your site can not be visited from a country if that country baan Blogger with the help of their local domain.
  • Because of the variety of your site URL from country to country the search ranking of your site might be affected.
So, considering the above three case you should stop Blogger from redirecting your site to local domain. And you can do it by using a simple code.

Stop Blogger Local Domain Redirection:
  • First Log Into your Blogger Account and go to Dashboard.
  • Now click on Template and then click Edit HTML button.
  • Here in this HTML page Find <head> tag and then Copy the below code and Paste it just below the <head> tag.


  • Then click on Save Template button to apply it.
That's it. From now Blogger will not redirect your site to any local domain. Your visitor will only be able to your site via .com domain.

In Case Of Custom Domain:

As I mentioned that above currently I am using custom domain www.ittimesbd.com on my blogger and I don't need to stop blogger local domain redirection. That means If you use custom domain on your blogger blog then you don't have to think about the blogger local domain redirection. In this case visitor only be able to visit your site using your registered domain from anywhere of the world.


Stay with www.iTTimesbd.com for more IT related Post

Monday, July 14, 2014

How to Fix 404 Error (Page not Found) in Blogger

When any page of a blog is not found then you will get 404 error message. This may happens if you have changed post or page URL over times or if you have removed it and if any visitor tries to enter your site by misspelling URL. As a result visitors automatically redirect to the 404 error page. Normally a 404 error page contains a message similar to it "Sorry this page you were looking for in this blog does not exist".


And this 404 error page create negative impression to visitors of a blog. If visitor get 404 error message instead of of their anticipated post than they can leave your blog with negative idea. But if you redirect your blogger 404 error page to a live page then there may be a chance, that the visitors will continue to read your blog.

Fix Blogger 404 Error page

There are several way to fix 404 error in blogger. But using a simple Javascript code you can easily fix Blogger 404 error problem. When you will implement this Javascript code on your blog then your visitors will be redirected to your blog homepage.

Redirecting Blogger 404 Error Page to Homepage:
  1. First Log Into your Blogger Account and got to Dashboard.
  2. Now click Settings and then click on Search Preference.
  3. Than click on Edit of Custom Page Not Found option.

    blogger search preferences

  4. Now Copy the below code and Paste it in the empty box.

  5.  Sorry, the page you're looking for in this blog does not exist.
    You will be redirected to homepage shortly.
    <script type = "text/javascript">
    BSPNF_redirect = setTimeout(function() {
    location.pathname= "/"
    }, 5000); 
    </script> 

  6. Then click Save Changes button to apply it.
Customization: If you want to redirect 404 error page to any other page than just Replace pathname with that page URL.


That's it. From now your visitor will be redirected from 404 error page to your anticipated page.


Stay with www.iTTimesbd.com for more IT related Post

Friday, July 11, 2014

How to Set Custom Redirects for Blogger Post

A blog/site may go through many changes over the times. While making these changes you may need to add/delete post. If you delete any post or URL and it does not exist on your blog then when people surf for this post they will get 404 message.

As a result this broken URL make negative impression to visitors about your blog/site. If you're blogging on blogger platform then the best way to avoid broken URL and keep the traffics to follow the right direction is setting custom redirects by Blogger Custom Redirection tool. You can only redirect URL within your Blogger blog.

Custom Redirects for Blogger Post

Let's consider my own case Details About National ID Card Bangladesh is one of the popular post of my blog. Somehow I have lost the post and I had to create this post again. But by this time the old post URL had got much popularity and also got place on first page of google search result.

As a result many visitors used to visit lost post URL which creates negative impact about my blog I also lose many valuable traffics. Recently I have fixed this problem by Redirecting Old post URL to New post URL. And my blog's traffic is also increased. That is why I have decided to share a post about setting custom redirects for blogger post.

Redirecting Old URL to New URL in Blogger:
  1. First Log Into your Blogger Account and go to Dashboard.
  2. Now click Settings and than click on Search Preference.
  3. Then here click on Edit of Custom Redirects option.

    blogger settings option

  4. Now here in Form field Enter old URL and in To field Enter new URL. Remember don't enter full URL. Omit the homepage URL (http://www.ittimesbd.com) of your blog from both the URL.

    blogger search preferences option

  5. Then click Save and then click on Save Changes button.

    blogger url redirects option

  6. If you want to Redirect more post then just click New Redirect button. 

That's it. Now the old and broken URL will be redirected to the new URL.


Stay with www.iTTimesbd.com for more IT related Post

Monday, July 7, 2014

How to Add Google Analytics to Blogger

Google Analytics is analysis tool which is created with the purpose of helping blogger and website owner to track the number of visits and pageviews of a site. This Google Analytics use several filters to check the location of the visitors, exactly from where they are coming from.

Google Analytics for blogger

Google Analytics is a leading free tool offered from the search engine giant Google. It has good relationship with internet marketing. That is why this tool can play a very much effective role to improve a site.


Though Google Analytics is a very important tools for Blogger, but still many bloggers may don't know how to add Analytics tracking code in Blogger. You don't have to be an expert to implement this code on your blog. It is very simple and quick task. Lets see how to do it.

Implementing Google Analytics On Blogger:

  • Getting Google Analytics Code:
  1. If you have a Google Analytics account then its perfect, If not than please Register.
  2. Than Sign Into your Google Analytics account and go to Admin.
  3. Now in the Property column click on Menu and then click Create New Property.

    Google Analytics new property

  4. Here enter information about your site and click Get Tracking ID.

    Google Analytics tracking ID

Now you will get a box with Tracking Code. Select and Copy this code.

  • Adding Tracking Code to Blogger:
  1. Now Log Into your Blogger Account and go to Dashboard.
  2. Then click on Template and then click Edit HTML. You will land on your blog HTML page.
  3. Here in this HTML page find </head> tag and Paste the Analytics Tracking Code just before this </head> tag.
  4. And then click on Save Template button.
That's it. Now within 24 hours you will getting statistics about your site on Google Analytics.

Stay with www.iTTimesbd.com for more IT related Post