Showing posts with label Google. Show all posts

Tuesday, August 3, 2021

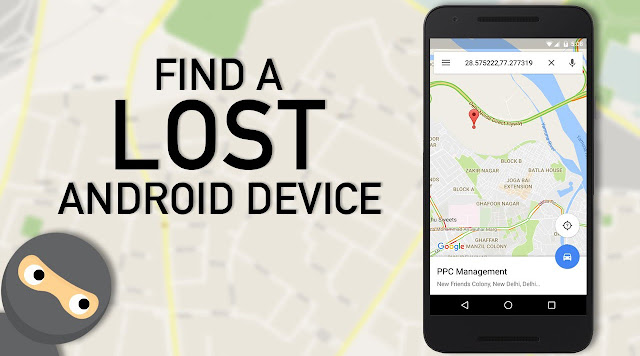
How to Find a Lost Android Phone with Google

How to Find a Lost Android Phone

In the current digital world mobile is the most used gadget in the daily life. But it become the matter of personal insecurity and the breach of privacy, when you lost or your phone is stolen. As your phone contains your personal information and data and you don’t want it falling into the wrong hands. It is not easy to track or find your lost or stolen smartphone, but if your phone is an android device than, with Google your can find your lost or stolen android smartphone. 

Google has an app and website that called Google Find My Device, though this google service you can find your lost/stolen android device, secure it, and erase all data. The most common situation happens to the smartphone users is, we sometimes forget our phone where we left, in such case if the phone is muted then it become difficult to find it out. This this post you will also learn to find your muted/silent phone with Google Find My Device.

To Find Your Lost/Stolen Android Phone, That Phone Must: 

  • Be turned ON 
  • Be signed in to a Google Account 
  • Be connected to mobile data or Wi-Fi 
  • Be visible on Google Play 
  • Have Location turned ON
  • Have Find My Device turned ON

Now Lets Find the Lost/Stolen Android Phone: 
  1. Go to Android.com/find and sign in to your Google Account, which you are using with your lost or stolen smartphone. 

    #Google’s Find My Device service is available as an Android app and as a standalone web page; both work the same way. 

  2. If you’re already signed into your Google account, you should see a map with your registered devices automatically displayed.
  3. On the Map your see the GPS location of your lost/stolen phone.

Google's Find My Device


Now If you have forgot phone where you have kept it and the phone is in silent mode, then...
  • Click on Play Sound  and it will Rings your phone at full volume for 5 minutes, even if it's set to silent or vibrate.

Try to follow the sound to see if it leads you to your device. When done, tap the Stop Sound button.
find android phone find my android google find my device find my phone google find my phone android find my device android lost android track my phone for free online find my phone huawei how to find a lost phone google find phone find my mobile google google locate my phone find my phone google account google dashboard find my device google imei tracker google phone locator track my phone google phone tracker google locate android phone where's my phone google find my phone with gmail
Stay with TecHie-ASiF for more IT related post

Sunday, June 5, 2016

Installing Google Play Store on Xiaomi Phone [FIXED]

Install Google Play Store on Xiaomi Phone
Hi guys Today I'm gonna discuss something different. Here in this post I'm gonna show you how to Install Google Play Store on Xiaomi Phones with MiUi 7. I have been using Redmi Note 2 for the last one year and recently I had sold the phone and reset it. As a result of that the Google Play Store was removed. But when I tried to install it by Google Installer, I failed :(

May be because of MiUi 7 update the previously used methods of installing Google Play Store are no more Working. And I searched on goggle and found on YouTube an update method for that. By which method I reinstalled Google Play Store on my sold Redmi Note 2. Lets have look at the Updated method of Installing Google Play Store on Xiaomi Phones with MiUi 7.


Installing Google Play Store on Xiaomi Phone:
  • Download the Zipped File from the Download Link given below.
  • *This Zipped File contains Four (4) files.
  • After completing the Download, Extract the Zipped File. You will get Four (4) files.
  • Then Transfer the Four (4) files to your Xiaomi Phone.
  • Now go to your Phone's File Explorer and find the location where you've transferred the Four (4) files.

    Install Google Play Store on MIUI 7

  • Then Install all the four (4) files one by one.
  • *Don't open anyone of this app, once they are installed. Wait all four to be installed before you open anything.
Install Google Play Store on Xiaomi

  • Once you have installed all four files (apps), Then Reboot your Xiaomi Phone.

After the Reboot is completed, Just open the Play Store on your Phone and Sign into it by using your Gmail Address. That's it, the Google Play Store will ready to download apps from play service on your Xiaomi Phone.


Download Links:

Please Share This Post 
Stay with techie-asif.blogspot.com for more IT related post

Wednesday, April 22, 2015

Download Google Earth Pro for Free! (Save $399)

google earth pro download
Google Earth is a virtual globe, map and geographical information program. Most of you might be very much familiar with this excellent tools. Why not, Because Google Earth is not a recent invention at all. It was created more than a decade ago. Actually the main objective of this post is to share a good news with you about Google Earth Pro. The good news is very recently Google has made the Google Earth Pro license free for all.


It's not it a very good news? I thing thing it is more than a good news if you are a regular users of this amazing tools. Because Earlier Google Earth Pro users had to pay $399 dollar per year as subscription charge. I guess Google has maid this Google Earth Pro free because subscribers of the Pro version are very few. On the other hand Google Earth Pro features are not necessary for all. But with Google Earth Pro version you will be able to do more. By the way today is World Earth Day.


Features of Google Earth and Google Earth Pro...

Google Earth:
  • Explore rich geographical content
  • Zoom from outer space to street level
  • Search for business locations
  • Visualize your GPS tracks and share with others
  • Fly around cities (or the entire world) in 3D
  • Go back in time with historical imagery
  • Dive beneath the surface of the ocean

Google Earth Pro | now free! - Get advanced business tools in addition to all the easy-to-use features and imagery of Google Earth.
  • Utilize data layers to locate your target demographic
  • Compute distances and areas using measurement tools
  • Use Movie Maker to produce media collateral
  • Print high-resolution images for presentations and reports
  • Import large vector image files to quickly map GIS data
  • Map addresses with the Spreadsheet Importer

So, when you are getting the Pro version free then you don't you move forward. Let's see how to get Google Earth Pro for free..


System Requirement:
  • Windows: Any Windows version from XP to 10
  • Mac: Mac OS X 10.6.0 or later

Your PC should be of good configuration to run it smoothly. (Dual Core processor and 2 GB RAM recommended)


Get the Google Earth Pro:
  • Here in this page latest version 7.1 and all the necessary fields are selected automatically.
  • So, don't change anything. Just click on Agree and Download.

Now you will get the setup file to download and Install Google Earth Pro. Double click on the Setup file the Google Earth Pro will automatically be started download and install. The size of the Google Earth Pro is only 25 MB.

download google earth pro


Get Free License for Google Earth Pro:

Requirement: You need to have a Gmail ID and License key. The License Key that provided by Google I have shared below. But if you don't have Gmail ID then Create One.

Once the Google Earth Pro is Installed properly you can not start to use it. Because it will ask you to Log In with the a Username and Password. Enter them properly...
  • Username: Your Gmail ID
  • License Key: GEPFREE
google earth pro free

Once you have entered the Username and Password click on Log In. That's it now enter you desired location name in the search box and start exploring the world from your PC with Google Earth Pro.


To use it more efficiently visit Google Earth Pro Tutorials


Please Share This Post or At Least press g+1 on Every Post

Stay with www.iTTimesbd.com for more IT related post

Tuesday, January 20, 2015

How to Reset Google Chrome Settings!

Google Chrome settings
Currently Google Chrome is the most popular internet browser. And I think this is the fastest internet browser. Sometimes you may want to or have to reset your Google Chrome. Thoough resetting Google Chrome Browser is a very easy task. Most of you may know it, but there are some beginner don't know the process and the effect of this action. This post is dedicated to them. In this post I am gonna write about the reasons and the results the Google Chrome reset. And also show how to reset it.


Reasons of Resetting Chrome:
Like the other browsers Google Chrome get slower after using it for a certain period of time. Basically a browser gets slower because of the extensions, toolbar and the additional programs that you use in your browser. On the other hand sometimes programs that you install can change your Chrome settings without your knowledge. Or you may see additional extensions and toolbar or a different search engine. By Resetting you can remove all these changes of your browse and your saved bookmarks and passwords will not be cleared or changed.

How to Reset Google Chrome Browser:
  • First click on the Chrome menu Chrome Settings menu located in the top-right corner of the browser window.
  • Then select the Settings.
Chrome Settings
  • Then click on Show advanced settings located at the bottom.
  • Then click on the Reset Settings button from the Reset settings section.
  • Finally click on Reset button in the appeared dialog box.
Note: Because of the Help make Google Chrome better by reporting the current settings check-box is selected you're anonymously sending Google your Chrome settings. And as result of this Reporting Google will be able to analyze your browser trends and also work to prevent future unwanted settings changes.

Result of This Reset:
  • The search engine that you had set will be reset to its original default.
  • Not only the homepage button will be hidden, but also the homepage URL will be removed.
  • New Tab page will be empty unless you have a version of Chrome with an extension that controls it. In that case your page may be preserved.
  • All the tabs will be unpinned that you had pinned.
  • It will clear all Default start-up tabs and browser will show a new tab when you start-up or continue where you left off if you're on a Chromebook.
  • It will clear all the Content settings and it will be reset to their default installation.
  • It will clear all the Cookies and site data from your browser.
  • It will disable all the Extensions and themes of your browser.

In a word the reset of Google Chrome will get back your browser to the condition from where you had started to use it, without loosing much of your data.


Stay with www.iTTimesbd.com for more IT related Post

Wednesday, October 1, 2014

Advanced Task Killer - Best Task Killer for Android

Best Task Killer for Android
Android OS is the most popular mobile operating system in the current era, and day by day the popularity is increasing. People like Android Operated device most because of its user friendly manual and multitasking. But inspite of having many advantages android devices has some problems too. Quick consumption of battery charge and getting slower are very common problem. Earlier I have shared several posts on Android Battery Saver App. And today I am sharing a task killer app named Advanced Task Killer, which will help you to maintain your android device speed and battery charge longer.

As I said you can do multitasking on your Android phone and tablet, that means you can run multiple android apps simultaneously on our device. Normally after completing task we kill apps manually, but some of the default android apps that runs continuously in the background and thus it drains battery charge quickly. We need to stop these unwanted apps forcefully to enhance the device battery charge. Get it from below link...


In such cases Advanced Task Killer is the perfect solution. This is the best android app that easily kill android tasks running in the background. This will show you the background running app on your android device. From these apps select the apps that you want to kill and tap on to Kill Selected Apps. As a result the selected apps will be killed. You can also set your device on Automatically Kill apps mode and it will kill the background apps automatically.

Advanced Task Killer task killing

If you choose Automatic apps Kill mode then you will have to set Auto Kill Level for your device. There are three auto kill level available, these are safe, aggressive and crazy. Select any one of the available level and it will kill your device apps according to the selected level...

Advanced Task Killer auto kill level

  • Safe: This level will only kill the apps aren't running but still consuming memory.
  • Aggressive: This level will kill the apps running background and apps aren't running.
  • Crazy: This level will kill all apps except the apps that you are using with.

There are two versions of Advanced Task Killer is available, these are Free and Pro version. The only difference between them is the free version is ads enabled. If you don't like ads, then upgrade Advanced Task Killer app from Free to Pro version. It will cost $4.99 USD.


Stay with www.iTTimebd.com for more IT related Post

Tuesday, September 9, 2014

What is Google Webmaster Tools? [Details Info]

Webmaster Tools
If you are regular blogger or a website owner then I am very much sure that you know the importance of search engine optimization for website and blog. Normally from the increase of your site's page views you can get an idea how optimize your site is. But you can not get any specific idea.

To get details information about your site you can use website monitoring tools for your site. There are many webmaster tools available, but who can be better than google. Google has a Webmaster Tools for website and blogger. Today I will discuss about this Webmaster Tools in details. Letter on I will publish series post about the various uses of this tools. Lets get answers of some question about this Webmaster Tools.

About Google Webmaster Tools:

Google Webmaster Tools is a free website monitoring service offered by the search engine giant Google. That helps you to monitor and maintain your site's presence in Google Search Result. Basically to include your site in Google's search result, you don't have to sign up for Webmaster Tools. But if you sign up for Webmaster Tools for your site then it can help you to understand how Google view your site and you can optimize your site's performance in search results.

Why Use Google Webmaster Tools:

The most important use of the Google Webmaster Tools is to monitor site's performance. Beside that these are some specific point for which a blog/website owner should use Google Webmaster Tools for his site. These are...
  • To make sure that Google can easily access your site's content.
  • You can submit new content for crawling and can remove the content that you don't want to show in search result.
  • To create and monitor the types of content that delivers visually engaging search results.
  • To maintain your site with minimal disruption to search performance.
  • To monitor and remove malware or spam issues so that your site stays clean.

These above information provided by the Webmaster Tools helps you to monitor and maintain your site. Beside that Webmaster Tools helps you to understand how the Google Search and the whole world sees your site. For this it provide the answer of the following questions...
  • Which sites are linking to your website?
  • Did some queries result in more traffic to your site than others?
  • Which queries caused your site to appear in search results?
  • Which sites are linking to your website?
  • Are your product prices, company contact info, or events highlighted in rich search results?
  • Is your mobile site performing well for visitors searching on mobile?

Who Should Use Google Webmaster Tools:

Everyone with a website/blog! From generalist to specialist, from newbie to advanced should use the Google Webmaster Tools. To have a better idea here I am presenting some names, who should use Google Webmaster Tools...
  • Business owner who delegates: If you think that you don't need to know the use of the Webmaster Tools, then its ok. But you should be aware of this Tools. Because when you hire a webmaster specialist for your site then can tell him to set up your website with Webmaster Tools. As a result you can monitor your site performance which will help you to make important business decisions about your site.
  • Site Administrator: A site administrator always care about the healthy operation of his site. This webmaster tools helps the administrator to monitor and in some cases resolve server errors, site load issues, and security issues like hacking and malware etc.
  • SEO Specialist: Search Engine Optimization is the most essential thing of a site for getting better Search Ranking. So, the Google Webmaster Tools helps the SEO specialist to monitor website traffic, optimize ranking, and make important decisions about the appearance of site's search results. 
  • Web Developer: Google Webmaster Tools helps the Web Developer to monitor and resolve common issues with markup, such as errors in structured data.


Stay with www.iTTimebd.com for more IT related Post

Monday, July 7, 2014

How to Add Google Analytics to Blogger

Google Analytics is analysis tool which is created with the purpose of helping blogger and website owner to track the number of visits and pageviews of a site. This Google Analytics use several filters to check the location of the visitors, exactly from where they are coming from.

Google Analytics for blogger

Google Analytics is a leading free tool offered from the search engine giant Google. It has good relationship with internet marketing. That is why this tool can play a very much effective role to improve a site.


Though Google Analytics is a very important tools for Blogger, but still many bloggers may don't know how to add Analytics tracking code in Blogger. You don't have to be an expert to implement this code on your blog. It is very simple and quick task. Lets see how to do it.

Implementing Google Analytics On Blogger:

  • Getting Google Analytics Code:
  1. If you have a Google Analytics account then its perfect, If not than please Register.
  2. Than Sign Into your Google Analytics account and go to Admin.
  3. Now in the Property column click on Menu and then click Create New Property.

    Google Analytics new property

  4. Here enter information about your site and click Get Tracking ID.

    Google Analytics tracking ID

Now you will get a box with Tracking Code. Select and Copy this code.

  • Adding Tracking Code to Blogger:
  1. Now Log Into your Blogger Account and go to Dashboard.
  2. Then click on Template and then click Edit HTML. You will land on your blog HTML page.
  3. Here in this HTML page find </head> tag and Paste the Analytics Tracking Code just before this </head> tag.
  4. And then click on Save Template button.
That's it. Now within 24 hours you will getting statistics about your site on Google Analytics.

Stay with www.iTTimesbd.com for more IT related Post

Thursday, April 24, 2014

Translate Webpage or Words By Google Translate!

Google the search engine giant is the indispensible part of the internet world. It has decorated the internet world with all necessary element. Recently google had down its server for sometimes and at that time the internet traffic decreased down upto 40%. It shows the importance of Google in the internet world.

Translate Text or Webpage Online

Most of the internet user knows Google has many product and services like Google Search Engine, Gmail, Blogger, Youtube and much more. Another essential google service is Google translate. In this post I am going to discuss about Google translate.

Google Translate is a free translator which provide instant translation between different language. Currently Google Translate support 80 different language.
  • With Google Translate You Can:
  1. Translate words and sentence.
  2. Translate document by uploading.
  3. Translate webpage by its URL.

You can even suggest correct translation if there are any wrong. Click speaker icon to listen the pronunciation that you have entered.

  • Words and Sentence Translation: To translate words and sentences first go to Google Translate. Then enter the word or sentence in the left box. Then from the above of the right box choose the language in which you want to translate. Your text will be automatically translated, otherwise click Translate button.
  • Document Translation: If you want to translate any document then first go to Google Translate. Then click Translate a Document option at the below of the left box. Then choose the document and upload. Then choose the language in which you want to translate your document. Now click on the Translate button.
  • Webpage Translation: To Translate a webpage first go to Google Translate and paste the URL of the webpage in the left box. Then choose the language to which you want to translate the webpage. And at the end click Translate button.

If you see that any translation is not showing the correct meaning in your desired language then you can correct this by using Contribute Better Translation option.


Stay with www.iTTimebd.com for more IT related Post

Monday, March 17, 2014

How To Send Voice Messages On Facebook!

Facebook is the largest and most popular social networking. People basically use Facebook to make himself socially connected. Facebook has some exceptional features for their users like Share, Text messaging and Video calling. But still Facebook users are missing something, like voice messaging. Day by day voice messaging is getting popularity and there was always a demand from the Facebook users to have voice messaging.

Facebook Voice Message

Recently Facebook has added voice messaging feature. Earlier we can make text chat, text comment and we also can use emos and images. Beside that using Facebook voice messaging now we can send voice message and make voice comment too.

Facebook voice messaging option is automatically enabled in Android and Iphone Apps. But users of the Facebook from computer have to use a simple Extension to make voice chat and comment. Only the Google Chrome Browser users can use this Facebook voice chat and comment feature. Because this extensions is only available for Google Chrome users. Let's see how to do it.


Follow the below steps to Use Facebook Voice Message:
  • For Computer Users:
  1. You need to have Headphone with Microphone from voice recording.
  2. At first go to here Talk & Comment.
  3. Then Install this Extensions in your Google Chrome Browser. After installing the extensions correctly then Restart your Browser
  4. Then Log in to your Facebook account. If everything is Ok then you will see Voice Messaging Button in your Facebook Comment and Chat option like below image.

    Voice Messages On Facebook

  5. Now when you want to make Voice Chat or Voice Comment just Hold Down the Voice Messaging Button to Record and Release when Done.
NB: After releasing button Voice Message will automatically be send from the Chat box. But at Facebook comment a link will automatically be generated after recording is done, Then just Press Enter to send the voice comment.

  • For Android and Iphone Users:
  1. At first go to a conversation and Tap this  button next to the box where you write a message.
  2. Then Tap Record Voice.
  3. Then Touch and Hold the Red Record Button and then Start Speaking.
  4. Then Release the Record button and your voice message will sent immediately.
  5. If you want to Cancel the recording then just Slide your finger from the record button before releasing.


Stay with www.iTTimebd.com for more IT related Post

Wednesday, March 12, 2014

How To Delete All Gmail Emails [New Gmail Interface]

Gmail is the free email service provided by search giant Google. This is one of the largest used mail service. You can have your personal Gmail account. Normally all mails sented to is stored in Gmail Inbox. If you don't delete mail from your Gmail account regularly then one day your Gmail account will be overloaded.

I am using Gmail for almost one year. Normally I don't delete mails and as result there was more than 3500+ mails was stored in my Gmail account. It will take a lot of time to delete all Gmail emails one by one. But recently Gmail has launched a new interface in which it has added an option to delete all Gmail emails. In new Gmail interface I have deleted all the unnecessary mails very easily. Today I will show How To Delete All Gmail Emails.

How To Delete All Gmail

To delete all Gmail emails you will have to open your Gmail account as standard view. Basic HTML don't have the option to delete all gmail. You may not be able to use Standard view in some old browsers. So, to use Standard view you will have to use update version of your browser. If you're not using Standard view then at the bottom of your browser you will see Standard View button. Click the Standard view button to activate Standard view button.


Follow the below steps to Delete All Gmail:
  1. At first Sign in to your Gmail account.(Standard View)
  2. Then Click More  at the left side from the option list.
    gmail more
  3. Then Click the All Mail option to view all mail.(See Below Image)
  4. Then click the Select button and it will select all the mails of the current page.(See Below Image)
  5. Then you will see a message like All 50 conversations on this page are selected.(See Below Image)
  6. Then just after that click  Select all 3695 conversations in Inbox to select all your inbox mail.(See Below Image)
  7. Now click Delete button to gmail.(See Below Image)

    select all gmail

That's it. Hope that now you will be able to delete all gmail from your Gmail account. Don't forget to comment.


Stay with www.iTTimebd.com for more IT related Post

Friday, February 28, 2014

How To See Saved Password In Google Chrome!

Sometimes we may need to sign up for several online account like Gmail account. When you sign in to any online account by entering the username and password from your Browser then the Browser ask you to save them. So, that you don't need to enter the username and password again and again. It is certainly very helpful, but if it goes to wrong hand then it can be very dangerous.

See Saved Password In Google Chrome

Sometimes you may forget your account password. But if you earlier save the password in your Google Chrome browser then there is an option to see the saved password in google chrome browser. In today's post I will show How To See Saved Password In Google Chrome.


View Saved Password In Google Chrome:
  1. At first open your Google Chrome Browser.
  2. Then click the Customize and Control button at the right top corner of your Chrome browser.
  3. Then from the drop down menu click Settings.
  4. Then scroll down to the bottom and click Show advanced Settings.
  5. Then here find Password and Forms and then click Manage saved Passwords.

    chrome password and forms

  6. Then a popup window will open. In which you will see the Accounts with Saved Password.
  7. Then in the window Select any account and click Show button to see the Saved Password.

    chrome password show option

  8. If you want to remove any saved password then just click the Cross button.


That's it. Now you can easily See Saved Password In Google Chrome.


Stay with www.iTTimesbd.com for more IT related Post

Tuesday, February 25, 2014

How To Make A Resume On Google Docs Templates!

A Resume a paper which contains the information of a person's education, credentials, work experience and accomplishment and it is use to apply for jobs. When you want to apply for a job then you need to make a Resume. There are several method to make a Resume.

How To Make A Resume

Above all method Google docs is one of the popular and easiest way to make a Resume. Google docs will allow you to make an standard Resume for free. Google docs has a large numbers of templates collection and from them you can use any one to make your Resume for free.


Making a Resume On Google Docs:
  • Choose A Template:
  1. At first go to the Google Docs Template Gallery. (Make sure that you are login with your Gmail Account
  2. Then in the search box type Resume and click Search Templates. (As you want to get templates for Resume). 
  3. Then you will get Templates for your Resume. Then choose a Template and click Preview if you want to see the Template.

    templates search

  4. After Previewing the Template if you want to make your Resume with this Template then click Use This Template button.

    use google docs template

  • Edit Template and Give Your Information: 
  1. Then complete your Resume with requires information such as your name, Address, Education, Experience etc. Google Drive is automatically save your resume and if you want it in future then you will get it from Google drive. You will also get templates for your cover letter from Google Docs Templates Gallery.

    your infor at google docs

  • Download or Print The Resume:
  1. After completing your Resume now click File.
  2. Then click Download As and choose the file type in which you want to download your resume.
  3. If you want to Print your Resume click Print option and print it in the format that you want.

    download your resume

That's it. Now you can make a Resume using the Google Docs Template.


Stay with www.iTTimebd.com for more IT related Post

Thursday, February 13, 2014

How To Create a Gmail Account Very Easily

how to Create Gmail Account
Google the search engine giant introduced their mail service Gmail in 2004. At that time Yahoo was the leader of service. Almost 80 to 90 percent users were using Yahoo mail. Beside Yahoo mail Aol and Hotmail was much popular. After Google launched their Mail service Gmail users are increasing very fast.

Creating Gmail account is very easy and quick. Beside that using a single Gmail account you can use almost all the Google product. Though many people may know how to create Gmail account but there are some beginners they don't know how to create Gmail account. In this post I am going to show How to create Gmail Account.
  • Follow the below steps to Create Gmail Account:
  1. At first go to this link Create Gmail. This will take you to the Create your Google Account page.
  2. Then in this page fill up the form with required information. Here in this page type your Username in Choose Your Username box. This will be your Gmail address. If your Username is not available then it will recommend you some related available username.
    enter gmail username
  3. Don't forget to check the Google Policy Agreement button.
  4. Then click Next Step button and it will take you to the Google+ profile creation page. All Gmail account create a Google Plus account when the gmail is created. in this step you can complete the Google Plus profile if you want.
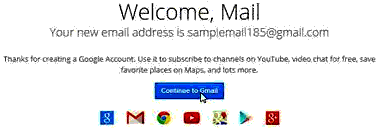
  5. Then click Next Step button again. Your Gmail Account is created and you will get Welcome message.
  6. Then click Continue to Gmail button to go to your Gmail Account.
    gmail message
Thats it, Now I hope that you can create your Gmail Account very easily.
  • You Can Try The Other Post About Google and Internet.
  1. How To Add Google +1 Button In Your Blog.
  2. How To Add Password On Google Chrome Browser.
  3. How To Make Firstest Search In Google Search.
  4. How To Add Google Custom Search Box In A Blog or Website.
  5. Google Chrome Shortcut Keys.

Monday, December 23, 2013

How to Add Google Plus Button on Blogger!

social sharing buttons
Google Plus or Google+1 is one of the largest social networking site. If you are blogger and blogging on Blogger.com platform then Google Plus is very important for you. Because it can a grate source of traffics. On the other hand as because this social site is a part of Google that is why Google search engine always give importance to the share or any other social activity done on the site. So, you should add Google Plus button on your site or blog to allow the to share your site on Google Plus. In this post I'm gonna share how you can add Google Plus button o your Blogger blog.

Please Share www.iTTimesbd.com Posts on  Google Plus

There are several way you can add Google Plus button on you website. But if you are blogging on Blogger platform then you can easily add the button from the gadget section. Normally the Google Plus button will automatically added to the footer part of the every post. But as Blogger.com is also provided by Google, That is why there is an official Google Plus button for Blogger.com users. And you can place the button anywhere you want on your blog. Let's see procedure...


Adding Google Plus Button to Blogger:
  • First Sign into your Blogger Account and go to Dashboard.
  • Then click on the Layout option.
  • Now click Add a Gadget link where you want to place the gadget.
  • Then from the Gadgets list choose +1 Button.
Google Plus Gadget
  • Then Customize the button Size and Annotation as you want.
  • Finally click on the Save button.

That's it, Now view your blog and you will see that the Google +1 button is appearing on your blog where you have placed it.


Also Read: Add Facebook Like Button Below Post Title


Stay with www.iTTimesbd.com for more IT related Post

Tuesday, November 26, 2013

How to Run Android Apps on PC by BlueStacks!

android apps on pc
If you're dying to run Android applications on your Windows PC, then I have a good news for you. Now all your favorite android application can be run directly on your PC by using an excellent android app player named BlueStacks. Actually BlueStacks is an android emulator, which made to play Android application on Windows and Mac PC. And like my other posts in this site I'm only gonna show only how you can play/run android application on Windows PC.

BlueStacks software gives you access to Android application on the Android Market, Get-jar, the Amazon App-store or 1 Mobile Market, and allows you to run them on your desktop.You can also use a companion Android app to download the same apps you have on your Android device to your computer and receive SMS messages sent to your phone on your PC. If you want to try then get BlueStacks from the below download link.
Download Now


Download the software from the official website of BlueStacks. The size of this software is around 15 MB. After the download is completed, install the software in your PC. It will take a few minutes to install and at the time of installation it will grabs most of the app's required files and other information from online.


Connect BlueStacks with Android Phone:

The set-up process is pretty straightforward, but Android smartphone owners will want to be sure they click the "Yes" radio button saying they have an Android phone. You will then be prompted for an email address and your telephone number including country code. BlueStacks will then send you an email and SMS message detailing how to sync your phone with App Player. Sometimes you may don't receive the SMS, but you will receive the mail and which is enough.


Launch the Apps:

Once you've entered your Android device details, you are ready to go, and you can start using the app. By default, you get a number of apps to try out right away such as Barnes & Noble's Nook app, Documents To Go, Ever-note, Fruit Ninja Free, Pulse, and StumbleUpon. To launch an app, click once on the program's icon. To return to the App Player start screen, click on the BlueStacks icon in the center of the navigation bar at the bottom of the App Player window.
Apps on PC


Downloading Apps on BlueStacks:

To download apps from the various Android app stores, just enter the app's name into the search bar found below your app gallery. You can download almost anything you could use on your phone; however, some messaging apps may not work.

To find a new app to use, just enter its name into the search bar and press "Find." App Player grabs apps from Google Play. But you can also download apps from other app stores including Amazon App-store for Android, Get-jar, and 1 Mobile Market. Click on the transparent window at the top of your Windows desktop and select the basket icon to choose a specific market.


Stay with www.iTTimesbd.com for more IT related post

Tuesday, November 19, 2013

How to Sign into Multiple Gmail Accounts at Once!

new gmail account
We have to create and use more than one Gmail account for several reason. Basically people create multiple Gmail accounts for personal, professional or educational purpose. But problem starts when you have to use multiple Gmail Account at the same time. Though you can Sign into your multiple Gmail account by different browsers, but when you can Sign into your multiple Gmail account from one browser then why should use several browsers. In this post I'm gonna show how to Sign into multiple Gmail account simultaneously from one browser.

If you have more than one Gmail Account, then you can use multiple Sign-in feature to switch between accounts without having to sign out and back in again. For example, if you have one Gmail Account for personal use and a different Google Account for business, you can easily switch between the two account within the same browser using multiple sign-in. Let's see how to do it...


Add Your Gmail Accounts:
  • First Sign into your Gmail Account.
  • Then click on the profile photo or email address at the top-right corner of the page.
  • Then click Add account from the drop-down menu.

Google Account Profile

  • Now Enter the username and password for another account you want to access. 
  • Finally click on Sign in.

That's it. After completing the process your new Gmail account will be added and you will be signed in both of your accounts. Now follow the below steps to switch between these accounts.


Switch Between Gmail Accounts:
  • Click your profile photo or email address at the top right of the page.
  • Then click on the Gmail account that you’d like to sign in.
switch between google account

That's it. Now you can easily add your necessary Gmail accounts and also can switch between your Gmail accounts easily without signing out.


Stay with www.iTTimesbd.com for more IT related post

Saturday, November 16, 2013

Dart - New Programming Language from Google!

google
Google has released a new programming language named Dart. In November 14, 2013 Google has released their programming language Dart 1.0 version. Google said that the Dart programming language can be used as a alternative of JavaScript. Google officials has said that the Dart programming language will be very helpful for the web application programmer and it will full fill the lacking of JavaScript program has. 

Google is working with the Dart project from 2011. In 2011 at Belgium a conference named Devoxx the programmer and the director of the dart project Lars Bak had given the information about Dart. Lars Bak had said that " If we want to develop the webs with the time, we have to invent new things, which includes programming language too. 

Google officials has said in Dart language site open source based Dart program writing, Code sample and tutorial will be available.You can visit the site of Dart programming language to know more about Dart  www.dartlang.org


Stay with www.iTTimesbd.com for more IT related post

Tuesday, November 5, 2013

Some Interesting Google Search Techniques!

google search techniques
Google Search is the world no. 1 and most used search engine. Google Search engine is the complete solution to find anything on internet. Basically people use Google Search to find information from internet. When you are searching something on internet by Google then you can use some simple techniques to search the internet more efficiently. In this post I am gonna share some interesting Google Searching Techniques to use it more efficiently.


Search a Whole Website:

Sometimes you may need to search information or document from an specific website. It that website don't have searching option then you can search that site from Google. By using the following trick you will be able to search a whole website on Google.

  • First go to Google.com
  • Then in the search bar type Site:
  • Then type the web address that you want to search. (i.e Site:www.ittimesbd.com)
  • Finally press Enter button.

That's it. Now Google will only show the result related to the site that have searched.


Search a Specific File Type:

Google Search engine is the grate source of any kinds file. You can find several types of content on Google. But if you want to search for any specific type of content then you can use its code to find it easily. Suppose if you want to find APK file of any Android app then just type -inurl: htm-inurl: html intitle: "index of" apk. In the same way you can download different kinds of audio, video, movie and E-book.


Search From Suggestion:

You can search from the suggestion recommend by Google  in case of wrong and unknown word. Go to Google.com and in the search bar type whatever you want to search. While typing you will get suggestion from Google. Suppose if you type how to jailbreak an iPhone and erase jailbreak from the line then the line will be how to an iPhone and for this line Google will recommend you several suggestion. Select the suggestion that you want o search on Google.


Compare Things on Google:

Sometimes we want to distinguish two product or subject. And to know information we Google about that two things. If you want to compare anything then just use VS in between the two things. For an example if you want to compare Galaxy and iPhone then just type Galaxy vs iPhone.


Search a Down Website:

If you're trying to to visit a website, but you can't visit that site or page because that site is down or the page is deleted. In such case you can use the Google to visit that site or page. If the site or page is indexed by Google then you can easily find that site or page from Google cache.

  • First go to Google.com
  • Then type cache: in the search bar.
  • Then type the web address that to want to search. (i.e cache:www.ittimesbd.com)
  • Finally press Enter button.

That's it. Now Google will show the indexed pages of that down site.


Stay with www.iTTimesbd.com for more IT related Post